
The Water Resource Planner in GreenKeeper App is the most powerful irrigation scheduling tool in the professional turfgrass management market. It uses advance agronomic and meteorological models to predict changes in soil moisture with hourly resolution. While the tool uses complex algorithms to optimize it’s estimates over time, it is design to be easy to use by the GreenKeeper Users. This short guide will explain how to configure and use the Water Resource Planner at your facility today.

Why Should You Use the Water Resource Planner?
On of the most difficult decisions a superintendent or field manager has each night is setting up irrigation program run times. Is irrigation required tonight or there sufficient soil moisture available avoid wilt tomorrow afternoon. If irrigation is required, how much should be applied? Is is 6, 12, or 18 minutes. The Water Resource Planner allows users to see when wilt is likely to occur and add irrigation – in two minute increments – to optimize the amount of irrigation required tonight.
The current version of the Water Resource Planner is still a beta product that is under continual refinement and research. The current version is designed to help schedule program-wide run times (i.e. Greens, Tees, Rough programs). Individual hole-areas (i.e. 1 Green or 5 Forward Tee) my have different micro-environments that require specific adjustments to one or more heads that irrigates those specific hole-areas (percent adjusts).
What is equipment is required to use the Water Resource Planner?
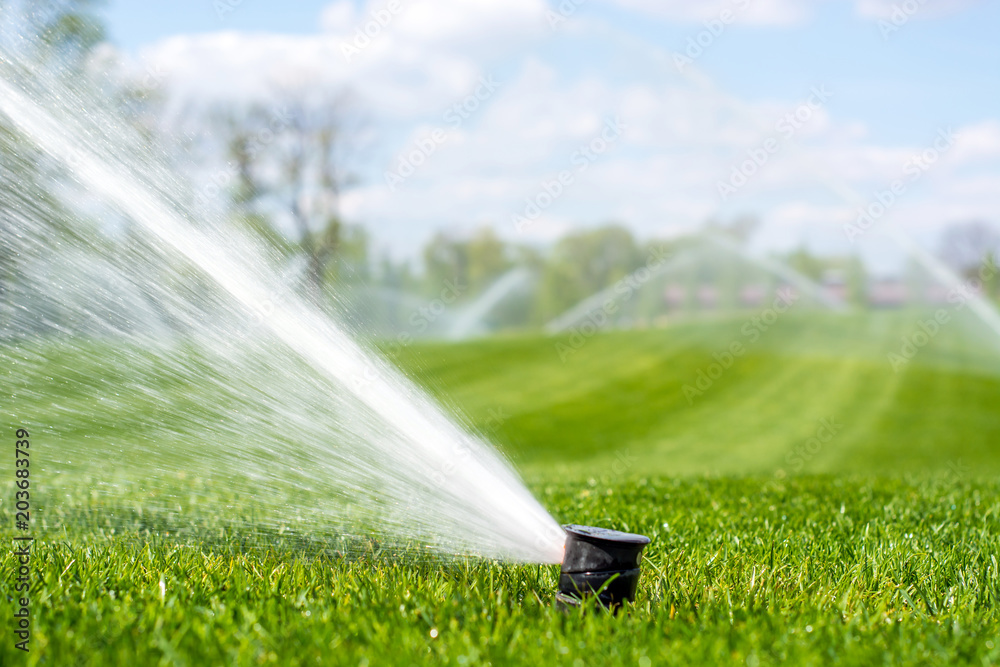
Only a soil moisture probe (Spectrum TDR or POGO) or an in-ground soil moisture sensor (Soil Scout or SPIIO) are required to use the Water Resource Planner.
Measure representative locations of the area of interest. For example, measure a dozen point in the middle of several putting greens to get an average soil moisture of the “Greens” area. Then you’ll enter that value and the approximate time that the measurements were collected.
While not required, it is also helpful to have an on-site weather station to record rainfall. An autonomous weather station with hourly measurement of precipitation.

Quick Start Guide
- Obtain the representative soil moisture for the different areas within an irrigation program with a moisture meter.
- First Time Configuration of the Water Resource Planner
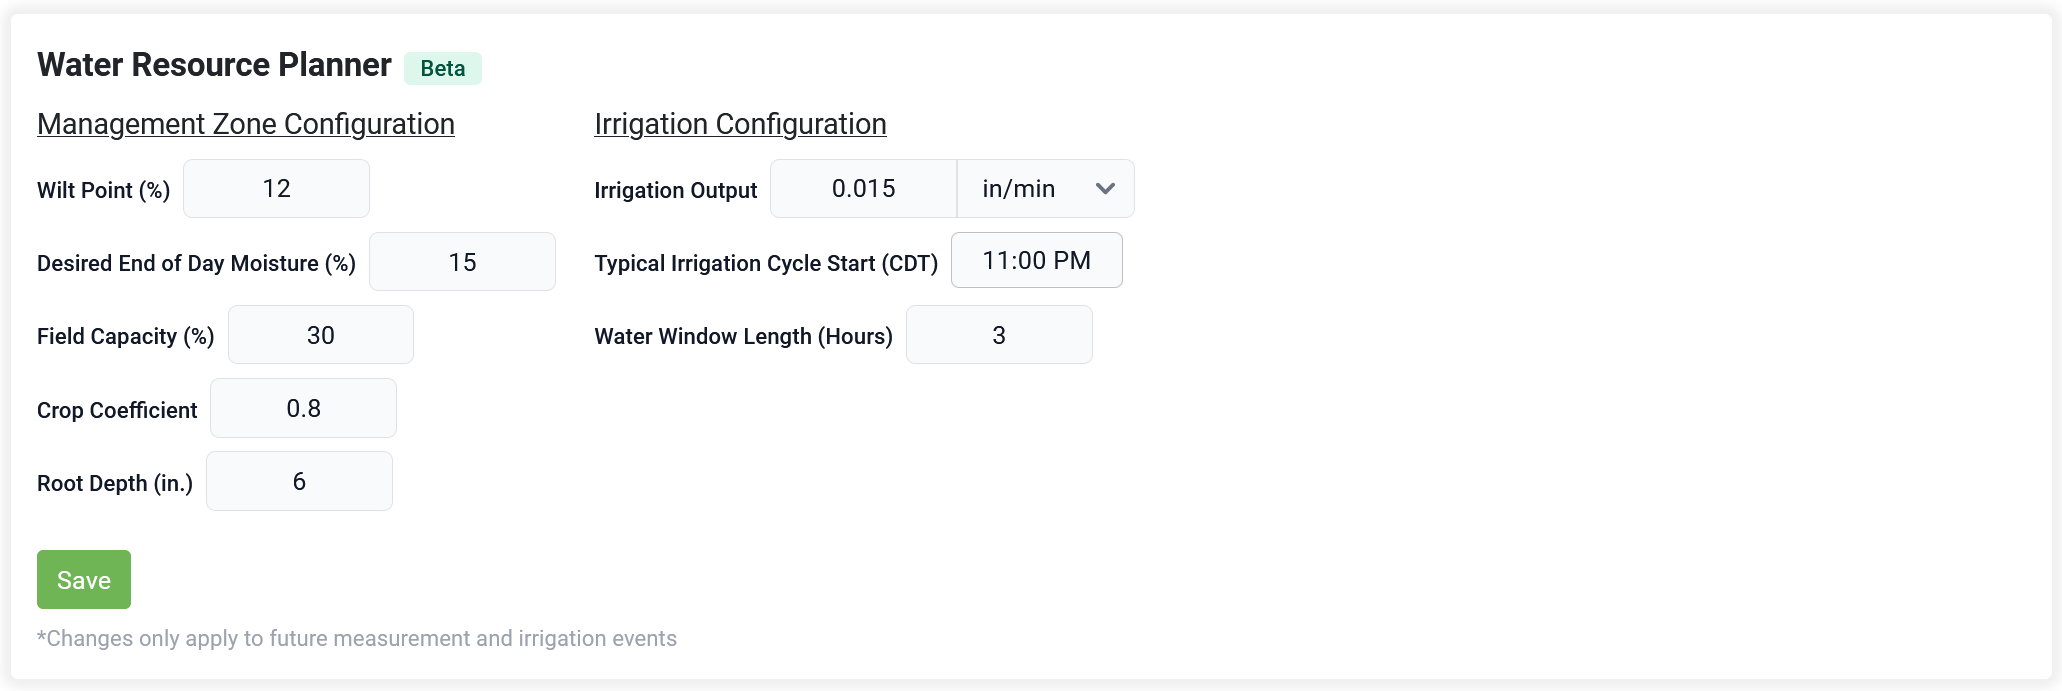
- Select the Management Zone on the GreenKeeper Homepage and scroll down to the Water Resource Planner (i.e. Greens or Tees)
- Set the Wilt Point (%), Field Capacity (%) and Desired End of Day Moisture (%) which are explained below. The End of Day moisture is usually 2 to 5% above the wilt point.
- Set the average Irrigation Output, Typical Irrigation Start start, and Typical Water Window (Hours). These values can be adjusted when adding irrigation events, too. These just represent typical values to save time later.
- Review the Crop Coefficient and Root Depth, but these will be automatically set and adjusted based on grass species, mowing height and changes in soil VWC with regular measurement.
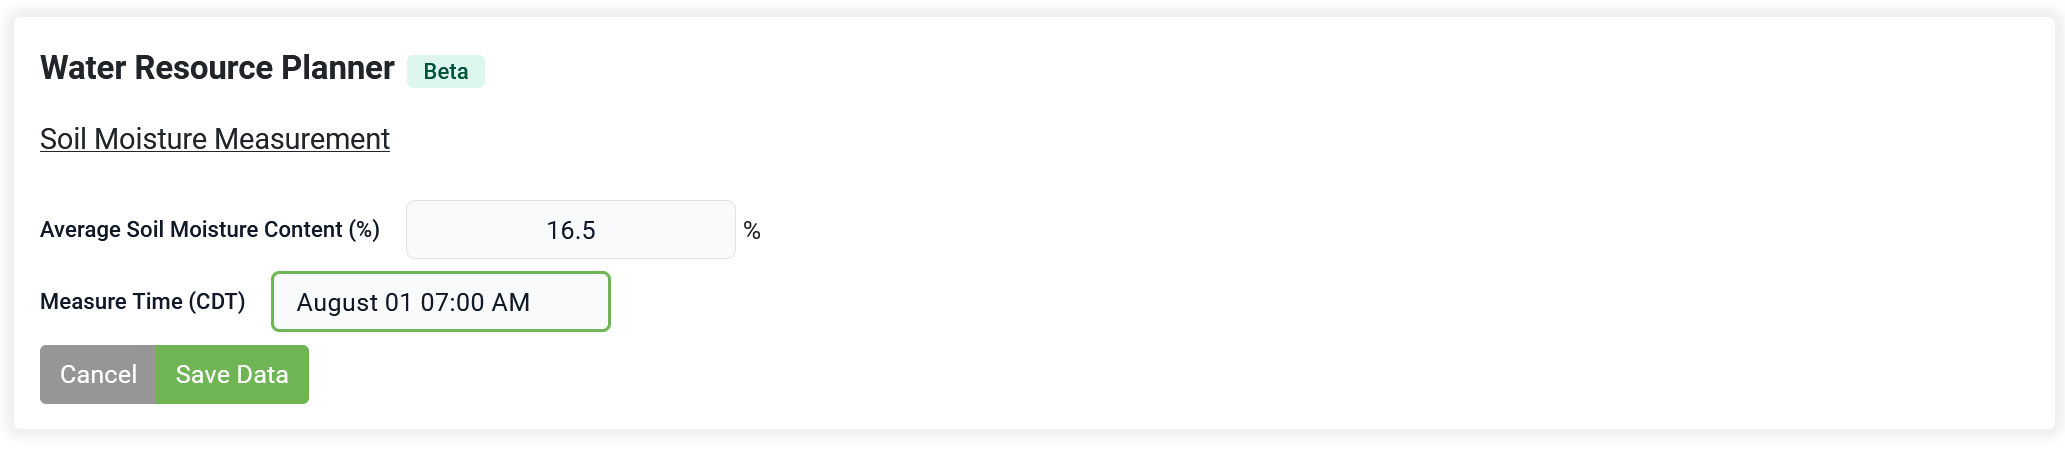
- Add the Soil Moisture and the approximate time those measurements were taken, and push Save Data. For example, the greens averaged 16.5% moisture at 7AM this morning.
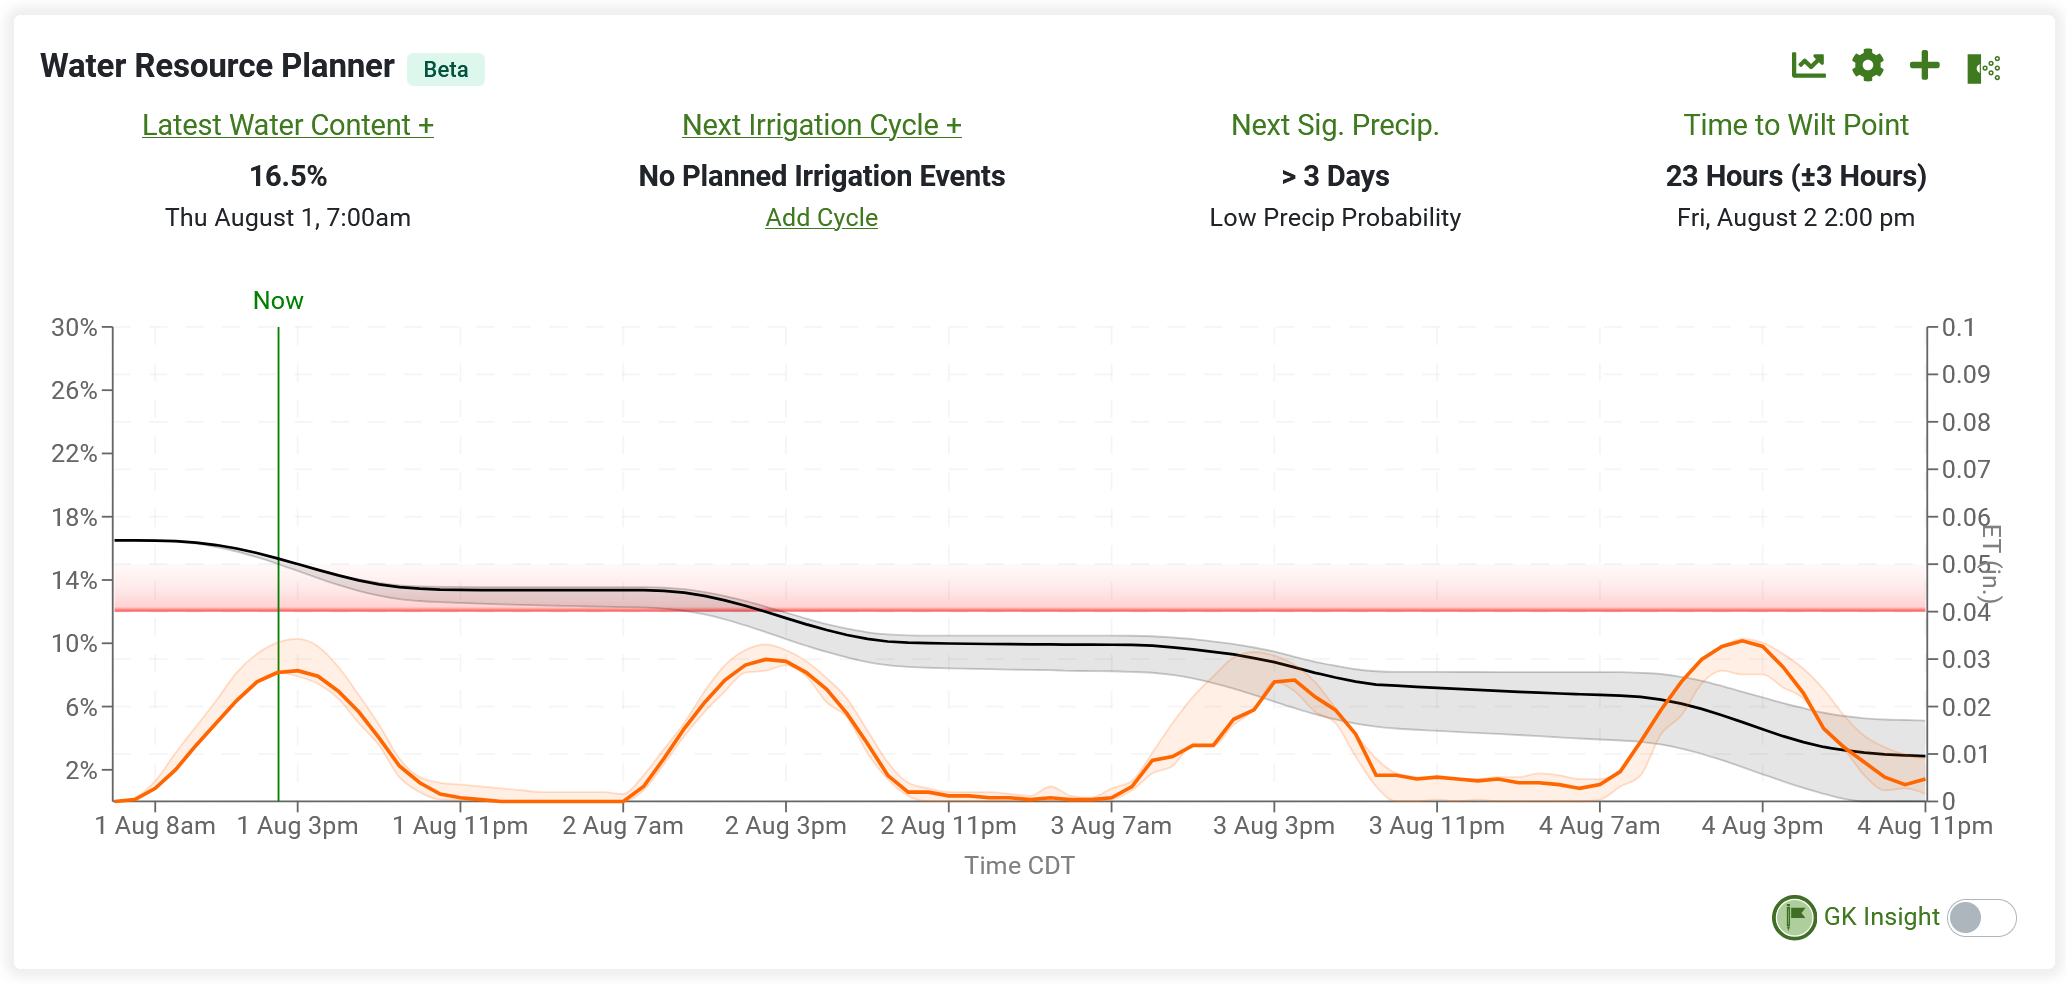
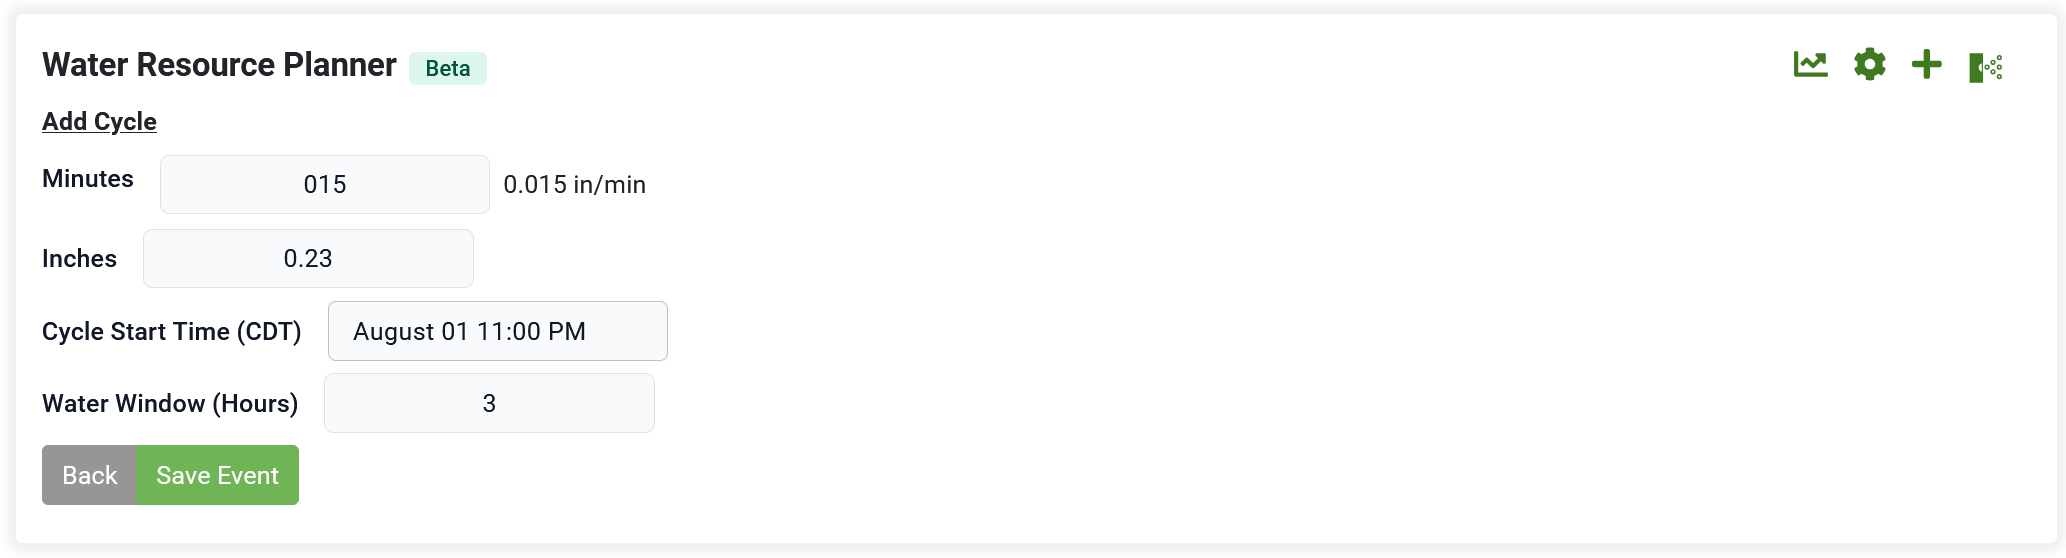
- Add Irrigation run times by clicking the “Add Cycle” to add a runtime and refine the start time/water window. The green sprinkler head icon in the top right corner also allows users to add, edit and delete irrigation run times.
- To Add a New Soil Moisture Measurement, click the green “+” sign in the upper right corner of the Water Resource Planner Tile.
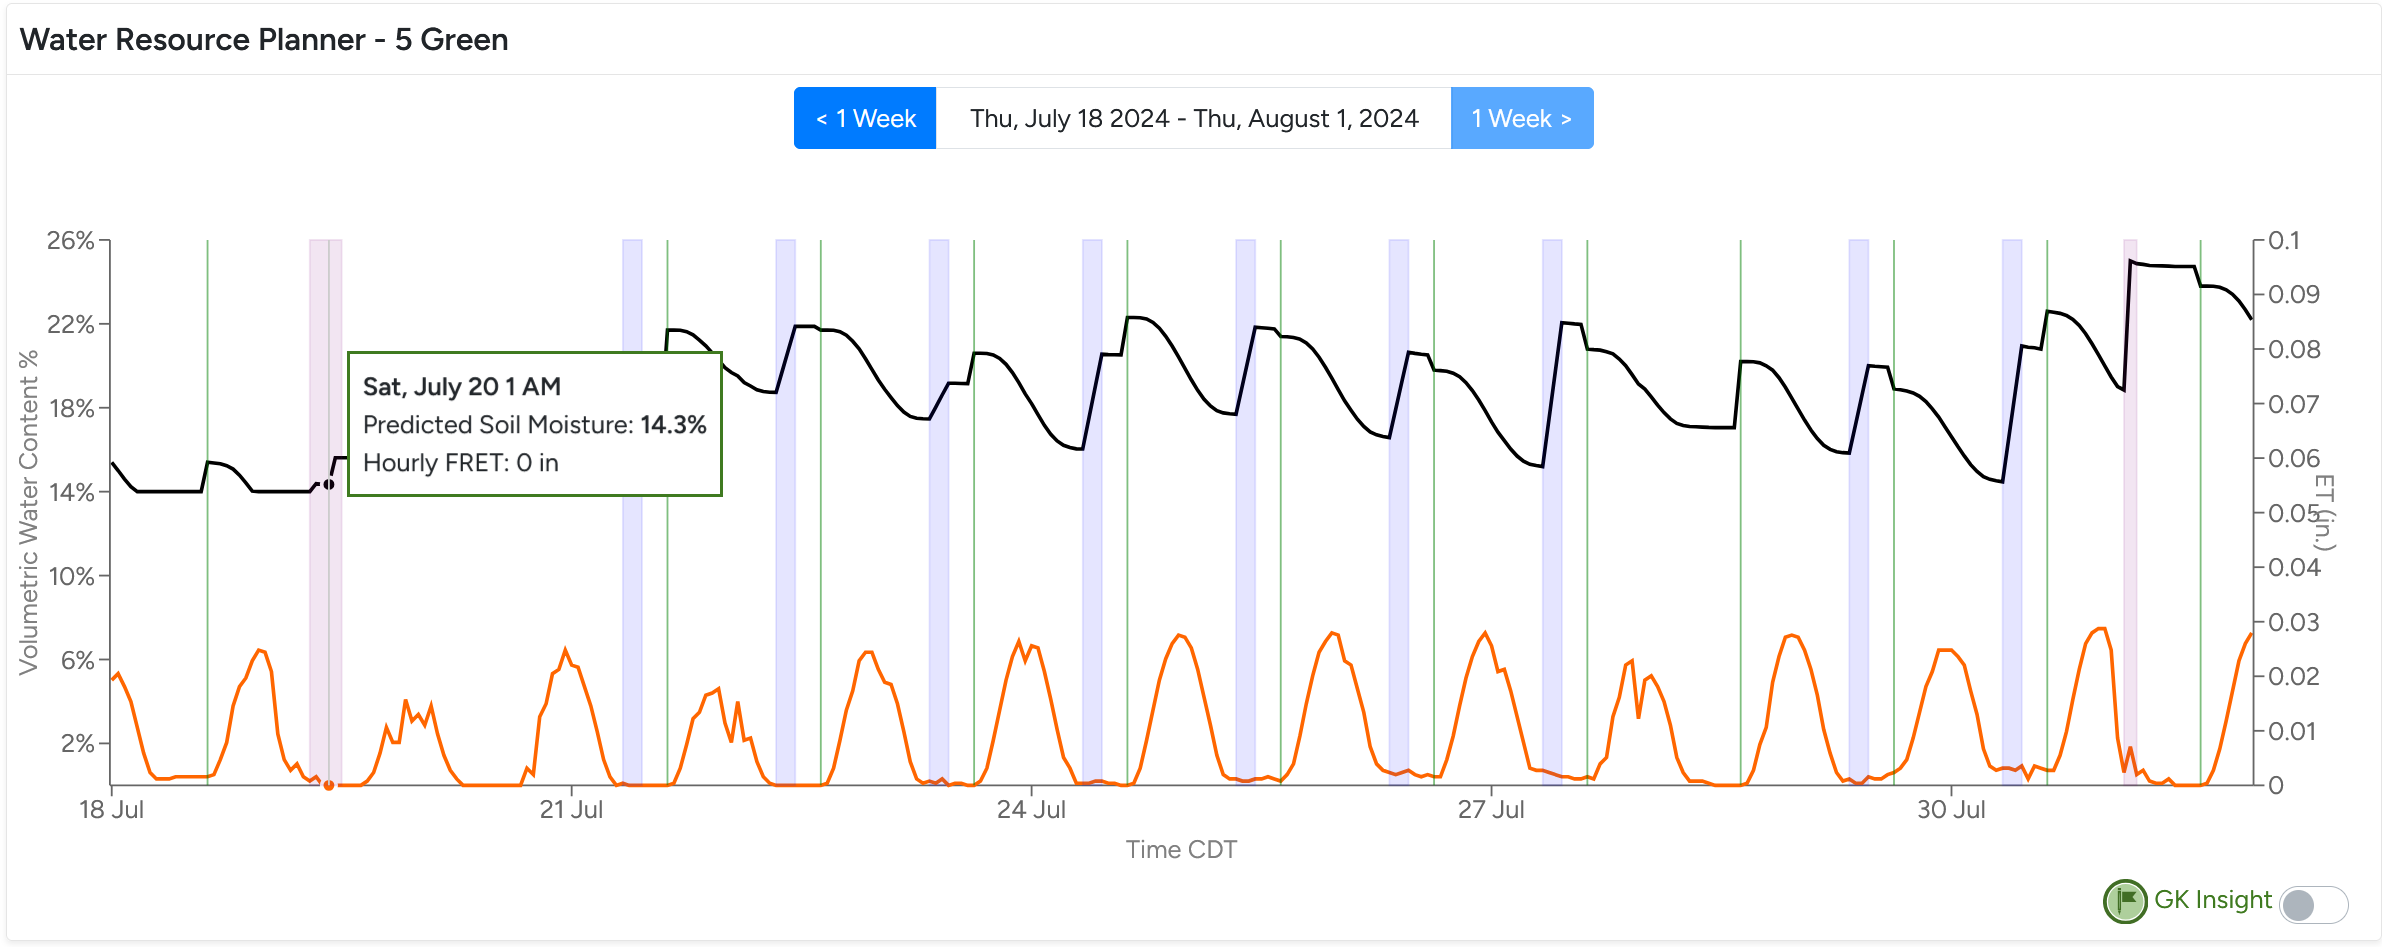
- Past moisture readings and predictions can be seen by selecting the graph button in the upper right corner of the tile.
Important Soil Moisture Values to Know
Every course is different. They have different grasses, soils, and micro-climates. This means that different courses and different management zones within a course will have different wilt points. Here are some important values that are required to use the Water Resource Planner:
- Wilt Point: This is the volumetric water content (VWC) where visible wilt starts to be noticeable. New sand-based putting greens may be as low as 5% while clay soil fairways may be as high as 35% VWC.
- Desired End of Day Moisture: While this isn’t typically discussed by turf managers, this is the ideal soil moisture at sunset. It is typically a few percentage points above the wilt point. For example, golf greens start to show wilt at 8% VWC and the golf course superintendent has a goal for the greens to stay above by sunset (4% above the wilt point. This value is important because it helps guide the irrigation run time prior day. Turf managers set irrigation to avoid wilt at the end of the day tomorrow.
- Field Capacity: This is the VWC 12 to 24 hours after a very heavy irrigation cycle or a rainy period. It represents the amount of water the soil can retain after gravitational drainage. Think of soil as a sponge. Dunk it in the water and some water will drain out. The water held by the sponge would represent it’s field capacity (%).
The new Water Resource Planner can be found on the homepage of GreenKeeper App. Start your subscription today to create your course for the 2024 growing season at https://GreenKeeperApp.com. New accounts enjoy a 7-day free trial.